Wednesday, July 18, 2012

Oat Crepes

Teaser of finished crepe with fruit

I stole the idea of Oat crêpes from Well Fed, Flat Broke, but the execution is fully mine. You see, Emily's recipe calls for 1/4 c butter and FOUR EGGS. I don't have any eggs right now, and that's a lot of cornstarch eggs to be dealing with. So I took my usual recipe of flour, 1 egg, some milk, and a buncha salt and adapted it to oats.
Unfortunately, oats absorb a lot more water than flour, so I ended up needing tons of milk after I started making them. I've adapted the recipe slightly, but please adapt it further to your needs.

Ingredients

1 c quick oats
1 1/2 c milk (at least)
1 tbsp cornstarch/1 egg
1 tbsp oil
1 tsp salt (at least)

Procedure

Put your dry ingredients in the blender. I put my cornstarch in, but you don't have to if you've already mixed up your "egg".
Blender with whole oats and cornstarch
My blender is from the 70's, I think. Possibly the 50's. I got it at a yard sale.
 Blender that up. Shoving the oats gently down towards the blade with a spatula will keep things going.

Blender with ground-up oats

Once the oats are all smooth, add your wet ingredients: milk, oil, egg/"egg".

Blender with ground up oats and wet ingredients unmixed

Blender that up as well. Remember that the oats will absorb a lot of the milk, so don't add more oats until after it's sat in the fridge for at least half an hour. You WANT it to be really soupy.

Blender with blended oats and wet ingredients

Let sit in the fridge for half an hour or so. Then give it another go on the blender and add milk or oats as needed. Go small on the oats, though.
Then grease a pan and heat it on medium until it's pretty hot. Otherwise, your first crepe will be a pale, oily thing.
Pour about 1/4 c of batter into a small skillet and tilt gently in a swirl to get batter in a nice, thin circle. This should not be stressful.

A crepe in the pan

Ignore the crepe until the edges pull up from the pan (or turn golden brown if they're too thick to pull away) and the surface is mostly cooked through. Flip gently.
Very gently, with oat crepes. They're a bit floppier than flour crepes, and take a while longer to cook, so don't rush things like I did.

Broken crepe in the pan

Below is what a nice crepe looks like. Your pan is all warmed up and heating evenly, and you've destroyed enough crepes to be patient.

Nicely browned, whole crepe in the pan

The second side to cook will always be spotty and paler than the first's nice, golden brown. Don't let this bother you. These are not like american pancakes. If it really, really bothers you, get a crepe maker or something.

Second side cooked of a crepe

Fill or top your crepe with whatever you want: peanut butter, jam, whipped cream, nutella, greek yogurt, fresh fruit, all of the above, whatever. All are good. Combinations are great. I'll do cream cheese and jam sometimes, peanut butter and jam, greek yogurt and jam, etc. I guess you could use butter, but crepes are thin and a little greasy, so they don't really need it.
I always put the goodies on the inside and fold the crepe into thirds around the filling, but some do a tight roll, some do halves, and some fold the crepe into thirds and put the goodies on the outside. Whatever strikes your fancy.
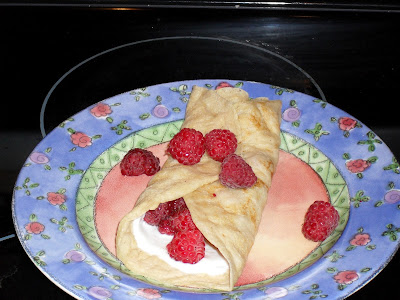
Filled crepe on a nice plate.
Fancy fancy crepe with greek yogurt and fresh raspberries from the community garden down the road.
I make crepes almost every Tuesday, usually in the evening, but that's because I love them so much. It's a very relaxing thing for me to do, especially since I usually have a lot due on Wednesday. It's a study break, a time to focus on nothing except the gentle swirl of the batter in the pan and the sizzle of cooking crepe. It's an exercise in patience, which I desperately need during heavy study times.
Also, be warned that this will make far too many crepes to eat by yourself (as will most recipes that claim to make 8. I think they want you to use a big pan or something). Invite your friends to share, or eat them for most of your meals for the rest of the week.

Monday, July 16, 2012

Successful Bread


Bread sponges are officially the best thing ever.
Teaser image of the bread you can make.
This light, fluffy bread was made with a sponge.

I found this post about how to make delicious bread from a sponge on Well Fed, Flat Broke quite a while ago and have been wanting to try it since I saved a blob of dough from the slightly unsuccessful if still delicious whole grain "Healthy Bread" from a while ago.
Just to clarify, a sponge here has nothing to do with cleaning and everything to do with letting yeast ferment overnight before putting it in dough. It's a lot like sourdough starter, but with store-bought yeast instead of sourdough starter.
I halved the recipe for my purposes, but it's an easy halving to do as long as you know that 1 tablespoon equals three teaspoons, or have a 1/2 tbsp measure. I'd never heard of one before, but my housemates have one. I love it so much.
Anyway, that was leading up to me telling you that I won't be posting the recipe, although I did take copious pictures. It's Emily's recipe with no changes, so go there and check it out.


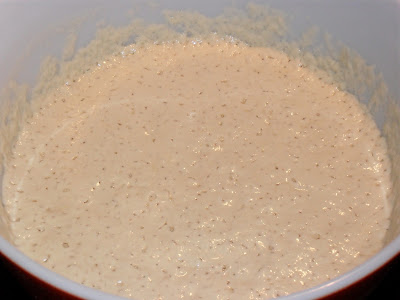
Bread sponge just after mixing up.
It all starts with milk, flour, and yeast, and a blob of dough if you saved some from the last time you made bread.

Sponge ready for sitting overnight, all covered in plastic wrap and a towel.
I'm not sure why the sponge needs to be covered with plastic wrap and a towel; maybe for insulation?

Sponge all bubbly after 12 hours or so.
Fermenting happened!

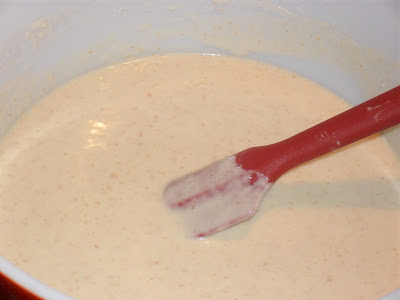
Sponge after stirring in the yeast, water, and sugar mixture.
The sponge was all gloopy even after I added the yeast/water/sugar mix. I used agave, actually, and it worked great.

All ingredients incorporated into the sponge, which is now a dough.
The dough seemed dry, but it really wasn't.

Dough pressed into the bowl to show amount of dough.
I kept stirring the dough, then pressed it into the bowl for a prettier picture.

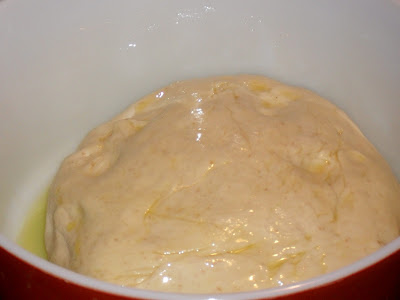
The dough, kneaded and oiled and waiting to rise.
This is the dough after kneading. I used about 3/4 c flour while kneading, then made a ball and used a little melted butter but mostly olive oil to grease the bowl.

The dough, doubled in size.
The dough rises really well in hot, humid weather.

The dough, pre-second rise in its pan.
The dough is pretty easy to work with; just smoosh it into a smooth log and plop it into a greased pan.

Very puffy dough after about five minutes in the oven.
I forgot to take a risen picture of the dough, so I snapped one about five minutes into the baking time. It rose about another two inches in the oven.

The finished, browned loaf cooling on a rack.
Ta da! I rolled my dough into a loaf. I don't recommend this method.

Loaf of bread looking artsy with a slice cut off.
Isn't it gorgeous? Other than the way it falls apart because I rolled it up and it didn't mesh.
My doughs always collapse and go dense. This was super successful, and I highly recommend the method, even though you have to plan ahead.

Sunday, July 15, 2012

Peanut Butter Cups

While walking through walmart with my housemates A and S the other day (we're classy broads), I developed a strong craving for peanut butter cups. I didn't have my wallet at the time, though, and I don't really have the money for it anyway.
I compromised and made some later.

Step one: make sure you have baking cups.
Step two: google peanut butter cup recipes and get a general idea of how to make them.
Step three: microwave a handful (larger than the one shown) of chocolate chips for about 15 s and stir until they melt together.

You WILL need more chocolate than this.

Step four: glob some of the chocolate onto the bottom of the baking cup. Smooth it around until it covers the bottom and comes up the sides a little.


Step five: mix a spoonful of peanut butter with a spoonful of brown sugar and a sprinkle of salt.


Step six: microwave the peanut butter for about 10 s; stir and microwave at 5-10 s intervals until the mixture is smooth but not melty.
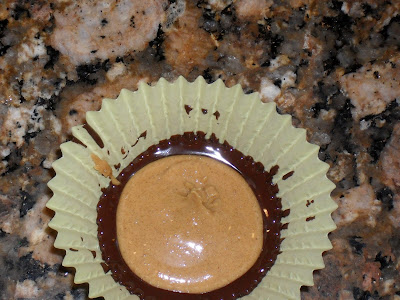
Step seven: glob a spoonful of peanut butter onto the chocolate in the baking cup. Make sure to get it as much in the middle as possible. Smooth gently.


Step eight: carefully glob the rest of the chocolate onto the peanut butter. If there's not enough, repeat step three with more before you glob. Smooth carefully over the peanut butter, all the way to the edges.


Step nine: place in refrigerator because it's a million degrees outside and you're impatient.
Step ten: set back out on counter to soften slightly before eating because you hate really hard chocolate candies.


Step eleven: devour.

Om nom nom.

Thursday, July 12, 2012

Vegan Lentil "Meatloaf"

It occurred to me recently that I haven't had meatloaf in over three years. We ate it a lot when I was younger because it was cheap, easy, quick, fed a lot of people, and everyone in the house would eat it. This is crucial when you have two small children and have an assisted living home in your house. But when my parents changed jobs, Mom became allergic to beef, and my brother became pickier than ever, meatloaf fell to the side. Turkey and lamb didn't cut it for my brother, and buffalo is too expensive. A few years later, I became vegetarian, rendering the point moot for me.
Unfortunately, I started craving a protein-and-vegetable-filled loaf. My only real requirement was that it involve ketchup. Also, it needed to use ingredients I actually have, which does not include cheese. Annoyingly, this limited me to vegan recipes that are specifically called "vegan" because all the "vegetarian" ones use about a pound of cheese. Which I don't have.

I found this recipe on Eat, Live, Run and adapted it to my ingredients. All I really did was use almonds instead of walnuts and add ketchup to the mix. I'm not adverse to trying other recipes, but this one was so successful that I'd rather not until I run out of  panko bread crumbs and need to find a recipe that doesn't need them. Oatmeal might do the trick, though.

Vegan Lentil Loaf

Ingredients

1 c lentils
3 c water
1 cube vegetable bouillon
1 large onion, diced
1 stalk celery, diced
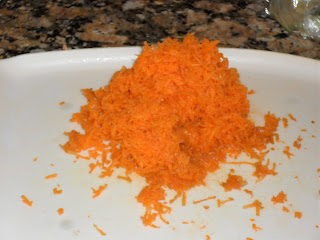
1 large carrot, grated
4 cloves garlic, minced
3/4 c chopped almonds, toasted
1 tsp mixed herbs
1 tsp salt
1/2 tsp black pepper
1 cornstarch egg (or flax or real; 1 tbsp cornstarch in 3 tbsp water)
1 c breadcrumbs
1/3 c ketchup
Topping
2 tbsp ketchup
1/2 tbsp vinegar
1 tsp maple syrup
1 tsp bbq sauce

Procedure

Preheat the oven to 350 F.


Bring water to a boil and add lentils. Don't add the bouillon until the lentils are pretty soft (about 20 min).


Dice onion and celery, add to a medium skillet with olive oil and saute until celery is tender.


Grate the carrot finely and mince garlic. Stir the lentils and onion/celery skillet from time to time.

When the celery is tender, add carrots and garlic. It will look horrifyingly fluorescent, but it's okay. Stir it around from time to time.

 Chop almonds pretty small.

Toast almonds. Do not do anything else except give the skillet a stir every now and then or you will burn your almonds. I'm serious. Don't even get your breadcrumbs ready and take a picture of them. Don't stir your skillet of fluorescent vegetables. Don't do it.

Add the almonds to the skillet after picking out the burnt bits. Give it a stir.
Add the salt, herbs, and pepper. Stir in very well; it will be very salty, herby, and peppery. Transfer to a large bowl.


Make and add your egg. If you use a real egg, beat it slightly before adding it. Stir well, or your breadcrumbs will get all soggy. Make sure your lentils are tender. If not, wait until they are before adding breadcrumbs.

Add breadcrumbs and stir.
Drain any excess water out of the lentils.

Add lentils and stir. It will want to form a segregated lump, but don't stand for that. Stir and squash the resistance out of those lentils until it's all mixed together.
Taste it. Decide that it needs ketchup.

Add ketchup, stir well. Press into a greased loaf tin, or 9" pie tin, or a muffin tin. Or something.

Mix ketchup, bbq suace, vinegar, and maple syrup together. Trust me on this. I hate bbq sauce, but it turned out quite nicely.


Pour and spread ketchup mixture over the loaf.

Bake for 40 minutes or so, until the edges pull away from the side of the tin.

Eat with vegetables, and probably a grain. Although, if you use whole grain bread for your crumbs, it might be okay.

It doesn't really taste like meatloaf. It doesn't really feel like meatloaf. However, it's close enough for me.


Tuesday, July 10, 2012

Rabbit Food Pyramid

I just thought I'd share this site: Rabbit Food For My Bunny Teeth. It's a health/fitness/food blog, and the girl who runs it has what she calls a "rabbit food pyramid" aimed at vegetarians but adaptable to any eating style.
She post recipes and fitness inspiration and tips and suchlike.
Picture stolen from Catherine of Rabbit Food For My Bunny Teeth.

The pyramid is really helpful, although none of my meals so far have had all the parts. I resist complicated meals, although the components of the meal might take me two hours to prepare. Lentil loaf, for instance, has produce, protein, and plant-based fat (almonds), but no whole grains. And I'm oddly resistant to the idea of eating grains with it. I guess it could be made with whole grain breadcrumbs. Still.
However, in spite of my vague resistance to the pyramid, it makes me think about what I'm eating. Is there plant-based fat in this? How many servings of produce have I had today? Ooh, whole grains sound good; how can I incorporate them into my day?
On that note, here's a site that has the US Department of Agriculture guidelines for serving sizes.

I propose that we all try to think about what we eat. That is all.

Fun Things To Do With Cream Cheese

Happy belated fourth of July! To my American readers, at least. And I hope that all of the days since I last posted have been happy, if not necessarily festive, for the rest of you.
Since the last time I posted, I've made several drafts of posts, had family over, baked a red velvet cake for A's birthday party, decorated said cake while preparing food for said party, and had more people over for a barbeque on the fourth of july (for which I made a dessert). 

I'm terribly sorry that I didn't take any pictures of the red velvet cake we made while we were making it. You'll just have to trust that your instructions have you do the right sorts of things, like we did. "We" here refers to me and my lovely, adventurous housemate S, who is especially lovely for reading my blog somewhat faithfully and thinking it's good.
We used "Savannah's Perfectly Ravishing Red Velvet Cake" recipe from allrecipes.com. In retrospect, I should've checked the flour requirements, because this recipe makes a very dense cake. Not that this is a bad thing, it's just that we weren't really expecting it, and also our cake was very, very dense and rich.
The main thing was that we were making it in a two-piece form shaped like a cupcake. One part was the bottom, with crinkles for the wrapper, and the other part was the top, with a swirl for the frosting. It was cool, but mostly just a thing we wanted to try.
It ended up looking pretty. We frosted it with cream cheese frosting based on "Cream Cheese Frosting II" (again from allrecipes.com), but ended up adding the whole 2 lb bag of powdered sugar because it's too hot for really soft, creamy frosting. We're also bad at guessing how much frosting will cover a given area of cake. Hint: less than we made.
Here's a picture. Like the rest of the party except the gritty fondue that still tasted pretty good, everything just kind of fell into place.

The sprinkles are huge ones that we found in a cupboard and were perfect.
I failed at leveling the two pieces, so there was a gap about an inch high all around where they didn't meet. I filled it with frosting. The bottom layer of sprinkles is on that section. Still, no one complains about too much frosting. 
That's a lie. I do that all the time. But not about cream cheese frosting.
 Cream cheese count: 16 oz, or two packages.

At the birthday girl's house the next day, we played games with water balloons, went swimming, made s'mores, and ate tons of food. Including a cheesecake. 
Cream cheese count: At least 8 oz --> 24 oz for the week so far.

The day after the second party, I realized that if I wanted to recreate a childhood fourth of july dessert, I'd better get going, as the fourth was about two days away. 
I knew it had a crunchy crust, a raspberry filling, and a creamy topping with crunchy bits on top. It was a thin, flat bar sort of dessert. The problem is that the only recipes I could find had the raspberry on top. So, I improvised. 
I present to you my somewhat final draft of the recipe, at least until I make it again next year and change it. 

Fourth of July Raspberry Bars

Ingredients

Pretzel crust

  • 2 1/2 c crushed pretzels
  • 3/4 c melted butter
  • 3 tbsp brown sugar
Raspberry filling
  • 24 oz frozen raspberries
  • 1/3 c sugar
  • 2 packets unflavored gelatin
Creamy topping
  • 8 oz cream cheese
  • 1/4 c sugar
  • 1 tsp vanilla
  • 1 c whipped topping
Crunchy bits
  • 1/4 c chopped walnuts
  • 1 tbsp brown sugar

Preparation

Pretzel crust

I used a big, heavy mug with a flat bottom in lieu of a hammer or mallet. Be aware that your bag will get lots of small punctures from the pretzels.
  • Crush pretzels. You don't really want them bigger than your pinky nail.
  • Melt butter and sugar in a large bowl in the microwave
  • Stir in pretzels until coated with butter and sugar
 
  • Press pretzels into a 9x13 pan
  • Bake 10 min at 350 F
  • Cool completely before using
Crunchy bits, part 1
  • Mix sugar and walnuts 
  • Give the sugar enough time to kind of stick to the walnuts; they should be ready by the time the creamy topping is set
Raspberry filling
  • When crust is cool, put raspberries in a saucepan
  • Sprinkle with sugar while heating
 
  • Mush raspberries as much as possible
  • When raspberry mush is bubbling, add two packets gelatin and stir well until dissolved
  • Remove from heat and let cool until raspberries are almost firm. Don't be impatient here.
 
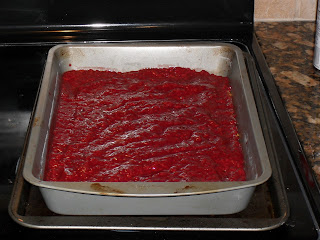
  • Spread over crust and refrigerate for about 8 hours
Creamy topping
  • After the raspberry mush has had 8 hours to set, beat cream cheese, sugar, and vanilla until fluffy
  • Add cool whip; beat until fluffy again
  • Spread over raspberry filling
  • Return to fridge until it's time to serve
Crunchy buts, part 2
  • Distribute walnuts over the creamy topping evenly
  • Press in gently
Remember: Let the gelatin set! Crush the pretzels small! Use lots of cream cheese!

Cream cheese count: 8 oz --> 32 oz for the whole weekend.